
Procedure of Jogeswarasana
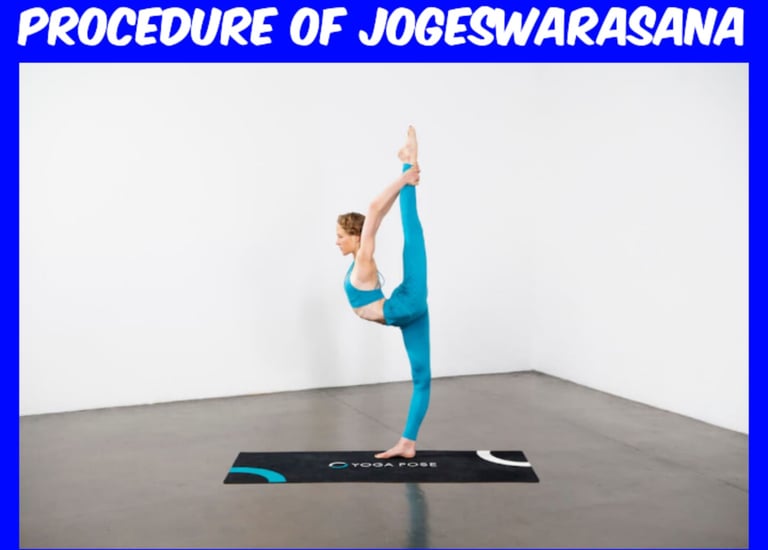
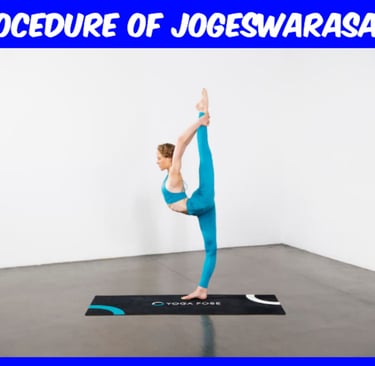
Jogeswarasana moreover known as Natarajasana (Master of the Move Posture), is an elegant and challenging yoga posture that combines adjust, adaptability, and quality. The posture speaks to Master Shiva in his enormous move, exemplifying the beat of the universe. It is a wonderful posture that extends the body whereas advancing steadiness and center. Underneath is a step-by-step direct to performing Jogeswarasana.Step-by-Step Procedure: 1. Begin in Mountain Posture ( Tadasana): Start by standing tall with your feet together, arms by your sides, and your weight equitably disseminated over both feet. Keep your legs straight, your chest open, and your shoulders loose. Take a few profound breaths to center yourself and plan for the pose. 2. Move Your Weight to One Leg: From Tadasana, gradually move your weight onto one leg (regularly the cleared out leg). Press your cleared out foot solidly into the ground, establishing yourself and making soundness. Keep the standing leg straight, but with a slight twist in the knee to keep up adjust and anticipate locking it. Lock in the quadriceps and center muscles to enact the standing leg. 3. Lift the Inverse Leg: Start to twist your right knee and lift the right leg behind you. Your objective is to bring the foot towards your glutes (but without driving it). This will make a profound extend in the front of your body, particularly the hips and thighs. Keep the pelvis adjusted by drawing your tailbone down and keeping your hips square. 4. Hold the Raised Foot: Once your right leg is lifted, reach your right hand back to get a handle on the inward curve of the right foot. You can hold your foot with either your right hand or your cleared out hand, depending on your adaptability and consolation. If you are incapable to get a handle on the foot at to begin with, it is affirmed to utilize a yoga belt or essentially center on the activity of reaching. 5. Lift the Chest and Open the Hips: As you get a handle on your foot, lock in your chest and lift it upward. Maintain a strategic distance from adjusting the back. Keep the shoulders open and drag the bear edges down the back to open the chest. Whereas doing this, proceed to center on opening the hip flexors on the standing leg side, whereas the hip of the lifted leg may turn marginally forward. 6. Extent the Arms: Extend your left arm forward at shoulder height, with your palm facing inward. Keep your fingers extended and active, reaching forward as you focus your gaze on a fixed point ahead of you (this is called the drishti). This helps you maintain your balance. 7. Balance and Hold the Pose: Once you are balanced and in the full stretch, hold the pose for 20–30 seconds, or as long as you feel stable. Ensure that you are breathing deeply and evenly. Use the muscles of the standing leg, core, and back to maintain balance and stability. Try to keep your torso upright and your body in one long line from the lifted foot to your extended hand. 8. Deepen the Stretch (Optional): If you feel stable and comfortable, you can deepen the stretch by gently pushing your lifted foot into your hand while simultaneously pulling the foot towards your body. This will increase the backbend and stretch the front of the body even further. 9. Exit the Pose Slowly: To exit the pose, slowly release your foot and lower the lifted leg back down to the floor. Return to the standing position with both feet grounded on the mat. Take a moment to breathe deeply and regain your balance before repeating the pose on the other side. Tips Modifications: Use a Strap: If you cannot reach the lifted foot with your hand, use a yoga strap around the foot to hold onto, or focus on working towards it over time. Balance Support: If you are new to the pose or struggling with balance, you can practice next to a wall or use a block under the standing leg for extra support. Engage the Core: Always engage the core muscles to protect your lower back and maintain stability in the pose. A strong core helps you balance more effectively. Avoid Overarching the Back: While the pose involves a backbend, avoid arching excessively, as this can strain the lower back. Instead, focus on maintaining a straight spine and lifting from the chest. Modifying for Beginners: If the balance is too difficult, you can practice holding onto a chair or wall with one hand for support, and then gradually reduce reliance on support as your strength and balance improve. Precautions: Neck Injury: If you have a neck injury, avoid turning your head to gaze upward, and instead, keep your gaze straight ahead or at a slightly lower point. Knee and Ankle Injuries: If you have any knee or ankle issues, be cautious when lifting the leg and bending the knee. Modify the pose as needed or avoid it until your injury heals. Back Issues: Those with back injuries should be cautious with the backbend element of the pose. Keep the spine long and avoid overextending to protect the lower back. Conclusion: Jogeswarasana is a challenging and empowering pose that requires strength, flexibility, and concentration. By following the steps carefully and practicing regularly, you can gradually improve your balance, flexibility, and mental focus. With time, the Lord of the Dance Pose will not only enhance your yoga practice but also contribute to better posture, improved alignment, and a sense of inner peace. Always practice with mindfulness and listen to your body to enjoy the full benefits of this elegant asana.
YOGA