
Procedure of Purna Pabanmuktasana (Full Wind-Relieving Pose)
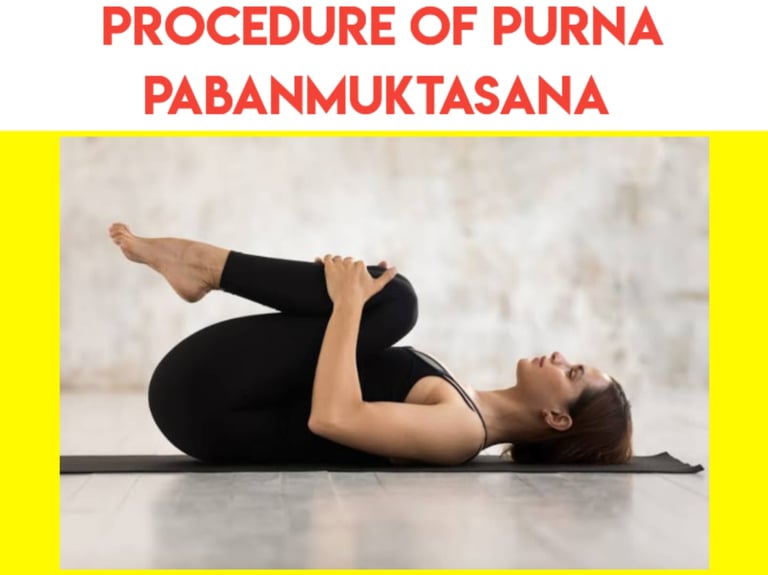
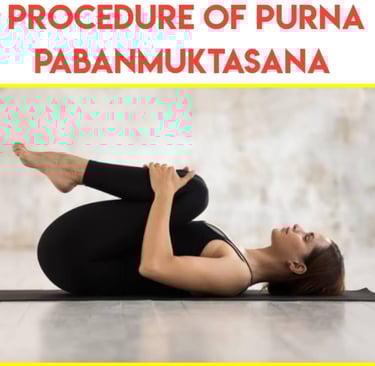
Purna Pabanmuktasana, too known as the Full Wind-Relieving Posture, is a yoga pose planned to offer assistance release trapped gas, progress digestion, and calm stomach distress. It is a straightforward however successful posture that offers different health benefits, including improved adaptability, moved forward circulation, and decreased push. Underneath is a step-by-step direct on how to hone Purna Pabanmuktasana accurately and safely. Step-by-Step Procedure 1. Begin in a Comfortable Lying Position: Begin by lying level on your back on a yoga mat. Guarantee that your body is completely loose and aligned, with your arms resting comfortably by your sides and your legs expanded straight. Your feet ought to be near together, and the toes pointing upward. Take a few deep breaths to relax and plan your body for the posture. 2. Bend Your Knees and Bring Them Toward Your Chest: Slowly bend your knees and draw them toward your chest. Keep your feet together and your knees close to each other. Hug your knees gently with both arms. You can either wrap your arms around your knees or hold your shins with your hands. Keep your back level on the mat, avoiding any curving. Lock in your core slightly to offer assistance back your spine and keep the lower back grounded on the floor. 3. Lift Your Head Towards Your Knees: While keeping your knees embraced to your chest, lift your head and neck toward your knees. Attempt to touch your chin to your knees or keep your head somewhat off the floor, depending on your adaptability and comfort level. Keep your neck loose and do not strain your head or neck whereas performing this movement. Hold this position for a few seconds whereas keeping up unfaltering, profound breaths. The breathing makes a difference develop the posture and helps in discharging gas and progressing circulation. 4. Center on Breathing: Throughout the posture, breathe deeply and slowly. Inhale through your nose, allowing your abdomen to extend, and breathe out slowly through your nose, pulling your stomach button towards the spine. The cadenced breathing makes a difference discharge pressure and invigorates the stomach related system. Make beyond any doubt your breath is calm and indeed, maintaining a strategic distance from holding the breath amid the hone. Center on making a sense of unwinding with each exhale. 5. Hold the Pose: Hold the posture for 20–30 seconds, or for as long as you feel comfortable. If you are a tenderfoot, it is best to begin with a shorter term and slowly increment the time as you ended up more comfortable in the pose. Ensure that your spine remains adjusted, and maintain a strategic distance from collapsing your shoulders or neck. The posture ought to feel comfortable and not strained. 6. Discharge the Pose: To discharge the posture, gradually lower your head back down to the tangle. Tenderly expand your legs back to the floor, and discharge your hands from your knees. Take a minute to unwind in the impartial position, lying level on your back with your arms by your sides and legs expanded straight. Take a few profound breaths to recuperate and reset. 7. Rehash (Optional): If you wish to develop the hone, you can rehash the posture 2–3 times, continuously tuning in to your body and maintaining a strategic distance from any inconvenience. Make beyond any doubt to rest between redundancies, permitting your body to discharge pressure and relax. Modifications and Tips: Neck and Shoulder Support: If you find it difficult to lift your head towards your knees or if it causes discomfort in your neck or shoulders, you can place a cushion or yoga block under your head for support. Leg Variation: If drawing both knees to the chest at once feels too intense, you can practice the pose one leg at a time. Bend one knee towards your chest while keeping the other leg extended on the floor. Switch legs after holding for a few seconds. Breathing Focus: Pay close attention to your breathing. Inhale deeply as you prepare to move into the pose, and exhale slowly as you draw your knees in. Use your breath to guide the relaxation and movement, ensuring you don’t strain your body. Gentle Pressure: Apply only gentle pressure with your arms as you hug your knees to your chest. Avoid forcing your knees too tightly into your abdomen, as this could cause discomfort or strain. Precautions: Neck Issues: If you have neck or spine problems, avoid lifting your head off the mat in this pose. Instead, keep your head resting on the ground, and focus on the lower body for the benefits of the posture. Knee or Hip Injuries: If you have knee or hip injuries, practice caution. If bending both knees toward the chest is uncomfortable, modify the pose by keeping one leg extended while drawing the other knee in. Always listen to your body and avoid forcing any movements. Pregnancy: Pregnant women should avoid this pose, especially during the later stages of pregnancy, as it may put undue pressure on the abdomen. Always consult a healthcare professional before practicing yoga during pregnancy. Heart Conditions: If you have any heart conditions or high blood pressure, consult your healthcare provider before attempting this pose, as the pose may not be suitable in these cases. Conclusion: Purna Pabanmuktasana is a simple yet highly effective pose for relieving digestive discomfort, enhancing circulation, and improving overall abdominal health. With its numerous physical and mental benefits, it can be a great addition to any yoga practice. However, it’s important to practice the pose with awareness and attention to your body’s limits, ensuring you don’t strain or push yourself too hard. By following the correct procedure and listening to your body, you can reap the full benefits of this rejuvenating pose.
YOGA