
Procedure of Salabhasana (Locust Pose)
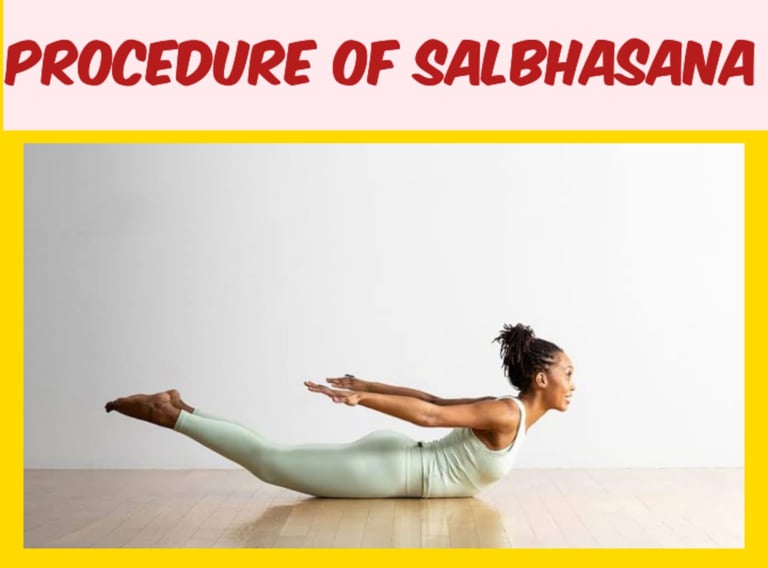
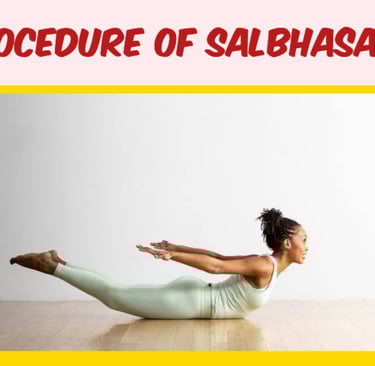
Salabhasana, also known as the Locust Pose, is a backbend that primarily strengthens the muscles of the lower back, buttocks, and core while also improving flexibility in the spine and stimulating internal organs. To perform this asana correctly, it's important to follow a step-by-step procedure to ensure proper alignment and avoid any strain. Here’s how to practice Salabhasana: Step-by-Step Procedure for Salabhasana: 1. Preparation: i. Start in Prone Position: Begin by lying down flat on your stomach on a yoga mat. Retain your legs extended fully, with your feet hip-width apart. The tops of your feet should press into the floor, and your toes should point straight. ii. Place Arms by Your Sides: Extend your arms along your sides, with your palms facing down. Keep your arms relaxed and close to the body, elbows straight, and fingers extended. iii. Adjust Your Head and Neck: Keep your head in a neutral position with the forehead on the mat. Do not strain your neck; keep it in alignment with the spine, and avoid turning it to the side. Ensure that your chin is slightly tucked in, keeping your neck long. 2. Engaging the Core: i. Activate the Core Muscles: Before lifting your body, draw in your abdominal muscles gently towards your spine. This will help stabilize your body and protect your lower back during the pose. ii. Legs and Pelvis Engagement: Engage the muscles of your legs by pressing the tops of your feet into the ground. Imagine drawing your legs inwards slightly, creating more stability in your lower body. 3. Lifting the Legs: i. Lift Both Legs Together: Inhale deeply and, on the exhale, slowly begin to lift both legs off the floor simultaneously. Start with lifting your thighs first, followed by the lower legs. Keep the legs straight, but avoid locking the knees. ii. Focus on the Hips: Your legs should lift from the hip joint, not just from the knees. Press your thighs up, aiming to keep them straight while lifting them as high as comfortably possible. Ensure that your feet are flexed and point toward the floor. 4. Lifting the Torso: i. Lift the Chest: As you continue to lift your legs, inhale and begin to lift your chest off the floor as well. Engage the muscles of your lower back to help you rise up. The more you press your legs down into the mat, the more you will be able to lift the chest. ii. Reach Your Arms Back: Simultaneously, extend your arms backward, palms facing down, and reach your fingertips towards your toes. This will help lengthen the spine and open the chest further. iii. Find the Balance: At this stage, both your chest and legs should be lifted off the mat, creating a gentle arch in the back. Your arms should be fully extended, and your body should be in a straight line from your fingertips to your toes, with the belly and hips still pressing into the mat. 5. Hold the Pose: i. Hold and Breathe: Hold Salabhasana for 15 to 30 seconds, breathing deeply and steadily. Keep your gaze focused downward or slightly forward, maintaining a neutral neck. Ensure that your breath is deep and smooth, with the inhales and exhales being equal in length. ii. Engage the Muscles: Throughout the pose, keep engaging the muscles of the back, legs, and core to maintain the lift. Avoid collapsing into the lower back or arching the neck excessively. The lift should come from your back and legs, not just your arms or chest. 6. Releasing the Pose: i. Slowly Lower the Body: To come out of the pose, exhale and gently lower your chest, legs, and arms back down to the floor. Take a moment to rest and breathe, and feel the effects of the stretch throughout your body. ii. Rest in Makarasana (Crocodile Pose): After releasing the pose, it is advisable to lie in Makarasana (Crocodile Pose) for a few breaths. In this position, turn your head to one side, extend your arms outward, and relax, allowing your back to neutralize and release any built-up tension. Modifications and Tips: i. For Beginners: If you are new to Salabhasana, you may want to try lifting just your legs first without lifting the chest. Once your lower body is comfortable, you can add the upper body lift gradually. ii. For a Deeper Stretch: For a more intense stretch, try clasping your hands behind your back once you have lifted your chest and legs, or reach your arms overhead while pressing the legs up higher. iii. Avoid Overexertion: Do not push your body beyond its comfort zone. Only lift as high as your body allows, and avoid arching excessively in the lower back. If you feel discomfort in your lower back, release the pose and rest. iv. Breath Awareness: Always maintain awareness of your breath. Deep, steady breathing will help you stay grounded and relaxed during the pose. Conclusion: Salabhasana (Locust Pose) is an effective yoga posture that strengthens the back, tones the core, and improves flexibility. By following the procedure carefully and incorporating modifications, practitioners can safely reap the benefits of this posture, such as improved posture, back strength, and overall vitality. As with all yoga postures, it’s essential to practice with mindfulness and listen to your body to avoid injury and ensure maximum benefit.
YOGA